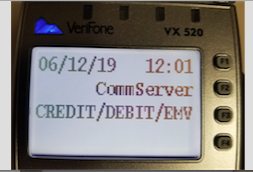
If you don’t process with a Verifone terminal, or if you have already completed this update, please disregard this notice.
Verifone has informed us of an expiring certificate that will impact processing if not resolved prior to June 25, 2019. This issue impacts all Verifone Vx520 and Vx680 devices regardless of processor and requires immediate action to ensure merchant processing activity will not be disrupted.
The VeriFone Terminal Issue applies to all services, including Petroleum and Gift Card processing.
IMPORTANT: The terminal must be settled/batched before you begin the EMA Update.
Video link to follow the necessary steps for the required EMA update:
Manual Steps for EMA Update:
Step 1. Print Reports and Settle the batch if needed.
Settlement Steps:
From the Sale/Phone Order/Check screen
Press the far left purple key (MORE)
Press F3 button for settlement
Press Enter to confirm total
Terminal will send settlement and print a settlement successful report
Step 2. From the sale menu, press * (Star Key) to display the application option screen. For Example:

Step 3. Press 9 to display EMA update options.
Step 4. Press F3 to select Update Now.
Step 5. Key in the password:
Vx520: press F2, and then press 1, Alpha, Alpha, 6,6, 8,3,1 and Enter.
Vx680: press 1, 6, 6, 8, 3, 1, and then press the green Enter key.
When the update is successful, an Estate Management Update Check Summary Report prints, which will list the Next Update Check date and time. This report indicates the terminal is up-to-date.
Note: The terminal will restart, check for updates, and restart again. When an external PIN pad is connected the process continues for approximately five additional minutes.
Notice: If the terminal displays 510 – No Updates Available, this indicates the terminal has already completed the required update.
Next step: To start processing sales, press F3 to access the SoftPay/Payments/Credit/Debit/EMV home screen.
If you receive a communication error, proceed with the following steps:
Step 1. Press 9 to display EMA update options.
Step 2.
Vx520: press the leftmost purple button to select More.
Vx680: press the scroll icon to display more options.
Step 3. Press F2 to select Settings.
Step 4. Key in the password:
Vx520: press F2, and then press 1, Alpha, Alpha, 6,6, 8,3,1 and Enter.
Vx680: press 1, 6, 6, 8, 3, 1, and then press the green Enter key.
Step 5. Press F3 to select VC Profile.
Step 6. Press F2, F2, or Next to select Comm Type.
Step 7. Verify the Comm Type displays the correct value:
Internet connections should display IP.
Phone line connections should display Dial.
Step 8. If the Comm Type is invalid, follow the procedure to change it:
Press F3 to select Edit.
Press F2 or Next to change to Dial for a phone line -or- IP for an internet connection.
Press F3 to select Slct.
Press F4 to select Exit.
Press F2 to select OK.
Step 9. Press the red Cancel key to exit the settings options.
Step 10. Press F3 to select Update Now.
Step 11. Key in the password:
Vx520: press F2, and then press 1, Alpha, Alpha, 6,6, 8,3,1 and Enter.
Vx680: press 1, 6, 6, 8, 3, 1, and then press the green Enter key.
When the update is successful, an Estate Management Update Check Summary Report prints, which will list the Next Update Check date and time. This report indicates the terminal is up-to-date.
Note: The terminal will restart, check for updates, and restart again. When an external PIN pad is connected the process continues for approximately five additional minutes.
Notice: If the terminal displays 510 – No Updates Available, this indicates the terminal has already completed the required update.
Next step: To start processing sales, press F3 to access the SoftPay/Payments/Credit/Debit/EMV home screen.
As always, if you have any questions please contact customer service at 800.366.3699 for assistance.
